
The process of disassembly, removing, replacing, and reinstalling parts, as well as, performing preventive maintenance (PM) on the Fisherbrand Elite single channel pipette requires great care. A high attention to detail, patience, and steady hands are required. Please dedicate a good work area with good lighting and space where small parts can be located should they fly out during disassembly. Pipette damage and lost parts may occur if attention to detail is not maintained. Please proceed at your own risk.
Recommended Tools:
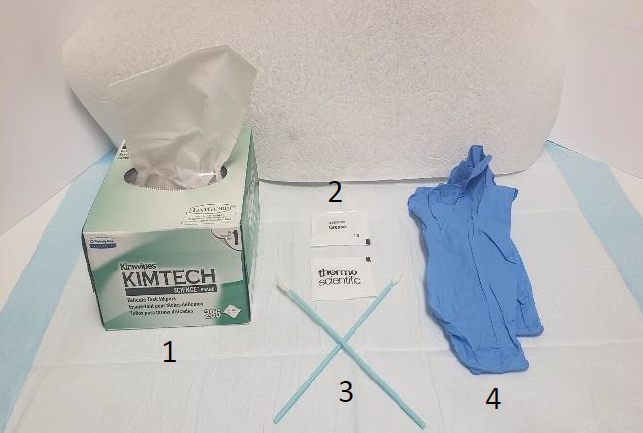
- Box of Kim Wipes
- Thermo Scientific Lubricant (Part#: TS 3300200)
- 2-3 Foam Swabs (applying new lubricant)
- Pair of latex gloves
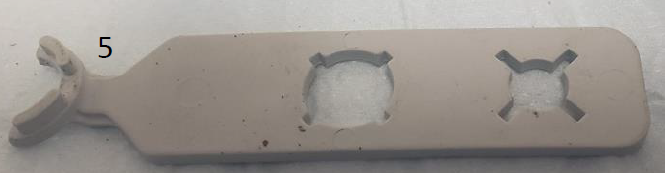
- PM/Calibration Tool (Part#: TS 1062800)
- Fisherbrand Elite Replacement Parts
Disassembly Process for PM and Part Replacement
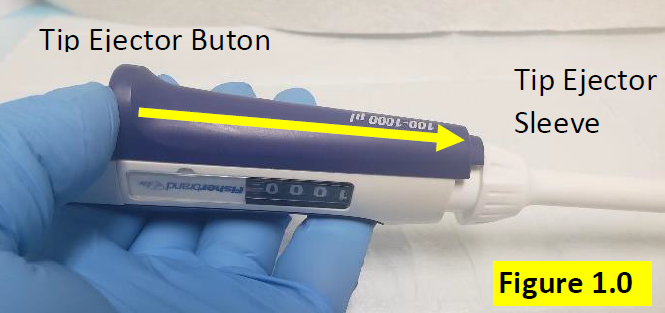
Step 1:
Press and hold down the tip ejector button, in order to lower the white colored tip ejector sleeve. Figure 1.0.
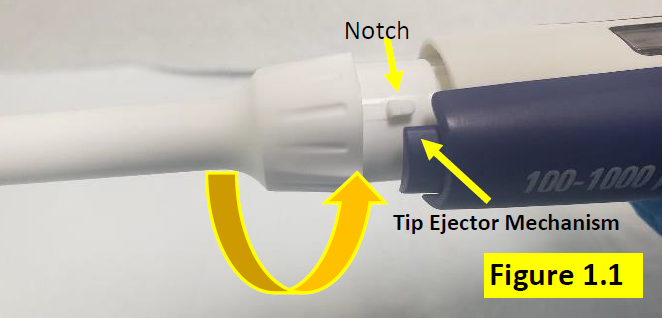
Step 2:
Twist and turn the tip ejector sleeve to disengage it from the pipette body. Notice the square notch will become visible when properly disengaged from the pipette body, tip ejector mechanism. Figure 1.1.
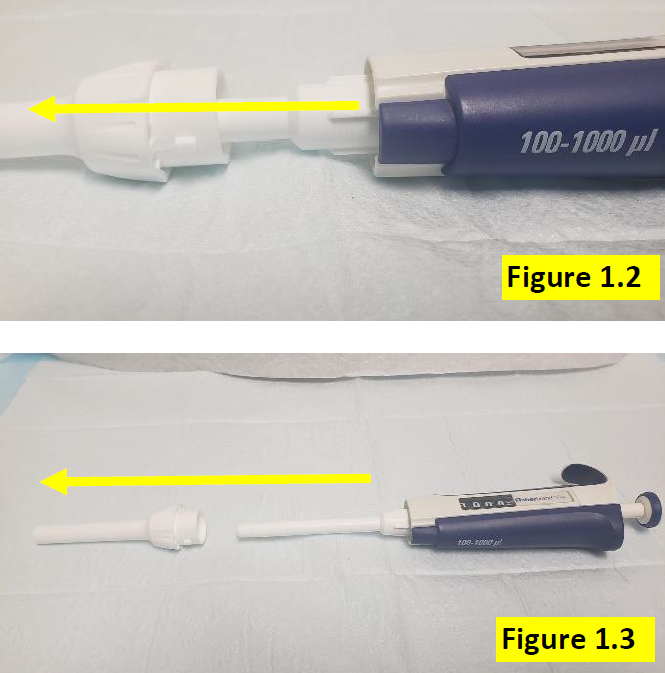
Step 3:
Once tip ejector sleeve is disengaged, slide it down and off of the pipette shaft, as shown in Figure 1.2 and 1.3.
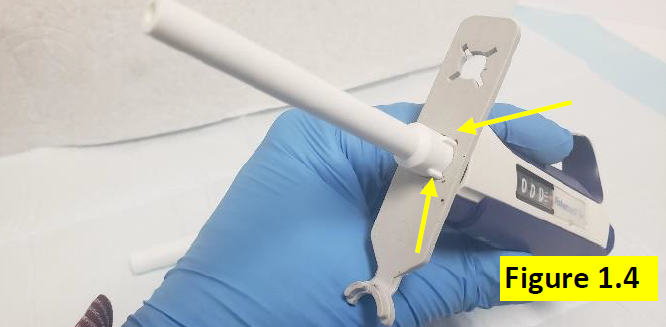
Step 4:
With the tip ejector sleeve removed, insert the PM portion of the calibration tool over the shaft until it aligns with the slit marks on the upper portion of the shaft. Figure 1.4.
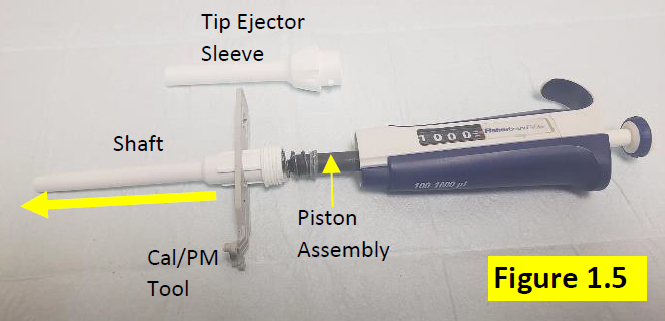
Step 5:
Rotate the PM/Calibration tool counter clockwise to fully disengage the shaft from the pipette body. Figure 1.5.
CAUTION: The contents inside of the shaft are under spring pressure. Use caution to avoid small parts and springs from popping out of the pipette/shaft, forcefully.
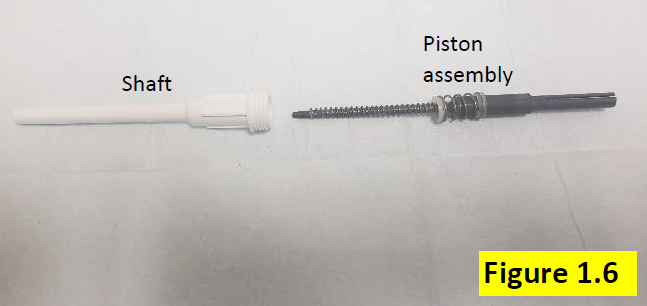
Step 6:
With the shaft fully removed from the pipette body, gently slide out and remove the black colored internal piston assembly. Figure 1.6.
When removing, ensure the following internal piston components are accounted for:
- Large piston spring
- Smaller o-ring spring
- Plastic spring support
- Piston o-ring
Step 7:
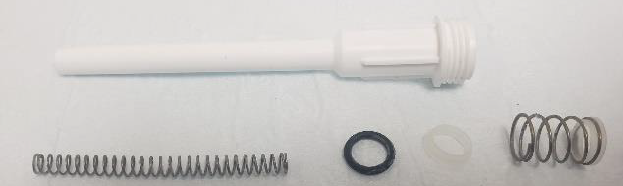
Remove all of the internal piston assembly components (Figure 1.7) for inspection, cleaning, and replacement as necessary. See Fisherbrand Elite Replacement Parts for these parts:
- Large piston spring
- Smaller o-ring spring
- Plastic spring support
- Piston o-ring
- Lubricant
- PM/Calibration tool

Step 8:
Inspect, clean, and replace the parts as necessary. Fisherbrand Elite Replacement Parts
Step 9:
Clean and remove the old lubricant from the piston with a clean kim wipe. Repeat as necessary and dab the kim wipe with IPA if needed to remove lubricant.
Step 10:
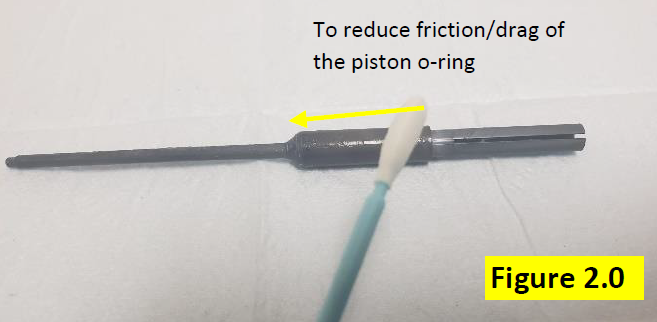
Use a foam swab and apply a light but visible coating of lubricant onto the piston assembly. See figures 2.0 and 2.1 USE THE CORRECT LUBRICANT (Part#: TS 3300200).

Reassembly Process After PM and Part(s) Replacement
Step 11:
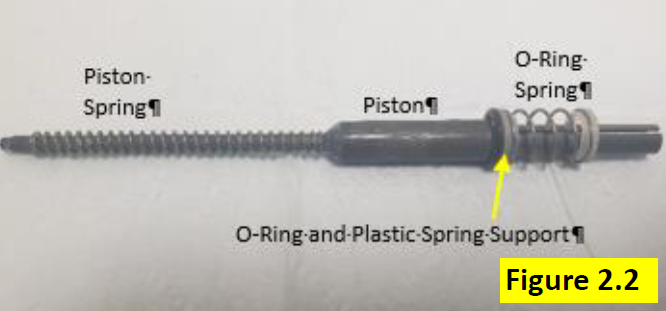
Install inspected, cleaned, and/or new part(s) back onto the piston, as shown in Figure 2.2.
Step 12:
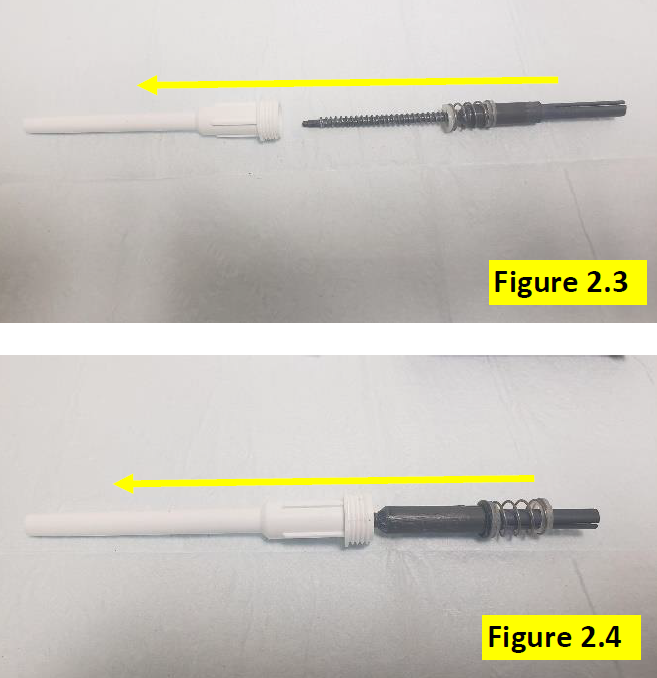
Insert the piston assembly back into the shaft assembly. Figure 2.3 and 2.4.
Step 13:
With the piston assembly back inside the shaft, use the PM portion of the calibration tool to screw the shaft dully onto the pipette body. Figures 2.5 and 2.6. DO NOT OVER TIGHTEN.
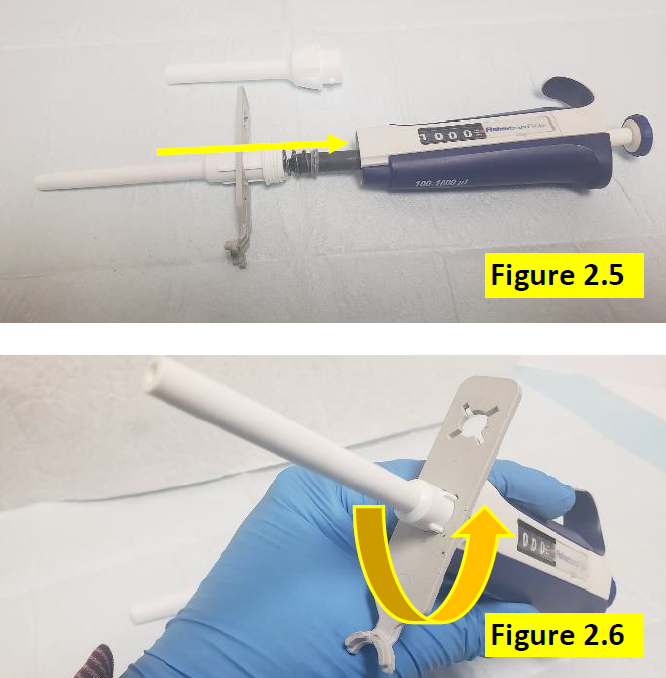
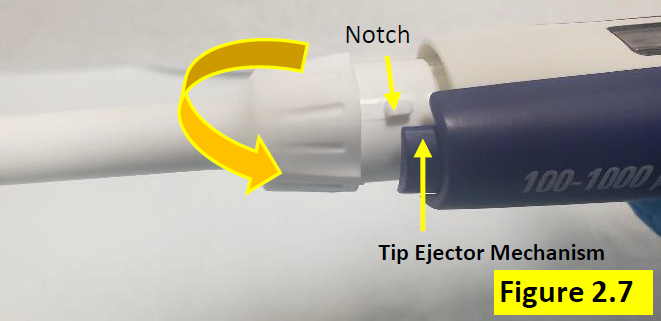
Step 14:
Press the tip ejector button down and attach the tip ejector sleeve to the tip ejector mechanism. Rotate so the notch aligns and secures to the tip ejector mechanism. Figure 2.7.
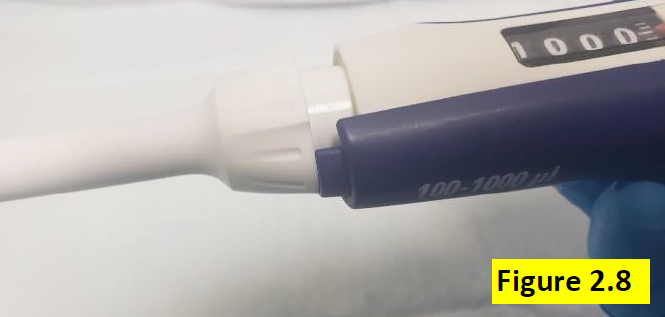
Step 15:
Figure 2.8 shows notch has been rotated and now secured to the tip ejector mechanism.
Step 16:
Once pipette is fully assembled, allow the pipette to equilibrate for at least 60 minutes. After 60-minute equilibration period, verify the accuracy and precision on a 4-5 place gravimetric place balance.
Related Posts:
Finnpipette F1 and F2 Tip Ejector Sleeve Replacement
Finnpipette Novus Error Codes
Non-Linear Volume Readings – When Should A Calibration Adjustment Be Made?
Top 10 Crimes Committed Against Pipettes
Disclaimer: Any action you take using the information on this website is strictly at your own risk. The information herein does not constitute professional advice and is general in nature. We make no warranty that this information will meet your requirements, be safe, accurate, or error-free. Pipette Supplies, Inc. is not responsible for any errors or omissions, any results obtained from the use of this information, or any loss or damage arising out of the use of this information. This site is for educational purposes only.
Fair Use: Copyright Disclaimer under section 107 of the Copyright Act of 1976, allows for “fair use” for purposes such as comments, criticism, teaching, scholarship, news reporting, and research.
Fair use is permitted by copyright statute that might otherwise be infringing.

